From Still Life To Sittings: Tips For Mastering Photography
Many people would call photography a personal hobby, but a large number of those people may not know the ins and outs of getting the best picture. Like with any other hobby, you need to be educated about the right way to take a photo if you want to get the best shots. This article contains a number of tips on photography that will help you do just that.
When photographing children, the best angle to take the picture from is their own eye level. Kneel down and put yourself at their height, snapping photos from the child's point of view. This will give you excellent pictures of a child, set in the world at their height. Most pictures of kids are taken looking down from an adult's point of view. This lends itself to many, many pictures of the top of a child's head or an awkward angle of their face.
Take your pictures quickly. The longer you hesitate, the better the chance that your subject will move away, break their pose, or become tired and stop smiling. Start taking shots as quickly as you can, and don't worry about getting the camera perfect before the first shot. The faster you shoot and the more photos you take, the better your chances are of getting a good one.
Learn to turn your camera on it's side. If the subject that you are shooting is taller than it is wide, then use your camera to make it take up more of the frame. Turn your camera on it's side and take a vertical picture instead of the traditional horizontal one.
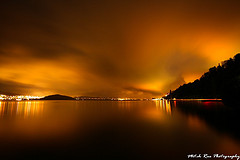
It's time for your tripod. Take it out of the closet and find the cable release. Still have those neutral density filters? Get them too. You're going for a night shoot at the school fair. You have arrived. See the pretty colored lighting at the booths and rides? You will photograph the Ferris wheel, exposing not for the overall scene but for the lights. Place the camera on the tripod and attach the cable release. Set the ISO low, at 100 or if possible, lower. Use a shutter speed of maybe fifteen seconds.
Set the aperture at f/16 or smaller if your camera can do it this will make pinpoint lights look like stars. Take some test exposures and make adjustments, and use your neutral density filters if necessary. You have a finished product! Thanks to the tripod, everything is sharp except for the ghostly images of fair goers moving about, and the turning Ferris wheel appears as a circular streak of gorgeous colors. The lights at the booths shine like stars.
As was stated in the beginning of this article, the difference between photography and good photography is a matter of education. If you know the right way to take a picture, you are more likely to get the shots you really want. Apply the advice from this article and you'll be on your way to taking the pictures you always dreamed of.
When photographing children, the best angle to take the picture from is their own eye level. Kneel down and put yourself at their height, snapping photos from the child's point of view. This will give you excellent pictures of a child, set in the world at their height. Most pictures of kids are taken looking down from an adult's point of view. This lends itself to many, many pictures of the top of a child's head or an awkward angle of their face.
Take your pictures quickly. The longer you hesitate, the better the chance that your subject will move away, break their pose, or become tired and stop smiling. Start taking shots as quickly as you can, and don't worry about getting the camera perfect before the first shot. The faster you shoot and the more photos you take, the better your chances are of getting a good one.
Learn to turn your camera on it's side. If the subject that you are shooting is taller than it is wide, then use your camera to make it take up more of the frame. Turn your camera on it's side and take a vertical picture instead of the traditional horizontal one.
It's time for your tripod. Take it out of the closet and find the cable release. Still have those neutral density filters? Get them too. You're going for a night shoot at the school fair. You have arrived. See the pretty colored lighting at the booths and rides? You will photograph the Ferris wheel, exposing not for the overall scene but for the lights. Place the camera on the tripod and attach the cable release. Set the ISO low, at 100 or if possible, lower. Use a shutter speed of maybe fifteen seconds.
Set the aperture at f/16 or smaller if your camera can do it this will make pinpoint lights look like stars. Take some test exposures and make adjustments, and use your neutral density filters if necessary. You have a finished product! Thanks to the tripod, everything is sharp except for the ghostly images of fair goers moving about, and the turning Ferris wheel appears as a circular streak of gorgeous colors. The lights at the booths shine like stars.
As was stated in the beginning of this article, the difference between photography and good photography is a matter of education. If you know the right way to take a picture, you are more likely to get the shots you really want. Apply the advice from this article and you'll be on your way to taking the pictures you always dreamed of.
